Calibrating Technika Lens Cams, part 1
Index
Check before starting
- Overall condition
- Ground glass
- Front bed
- Original lens and cam
- Lens board
- Lens stops
- Body rail
- New cams
- Bending the cam
How does the Rangefinder work?
Introduction
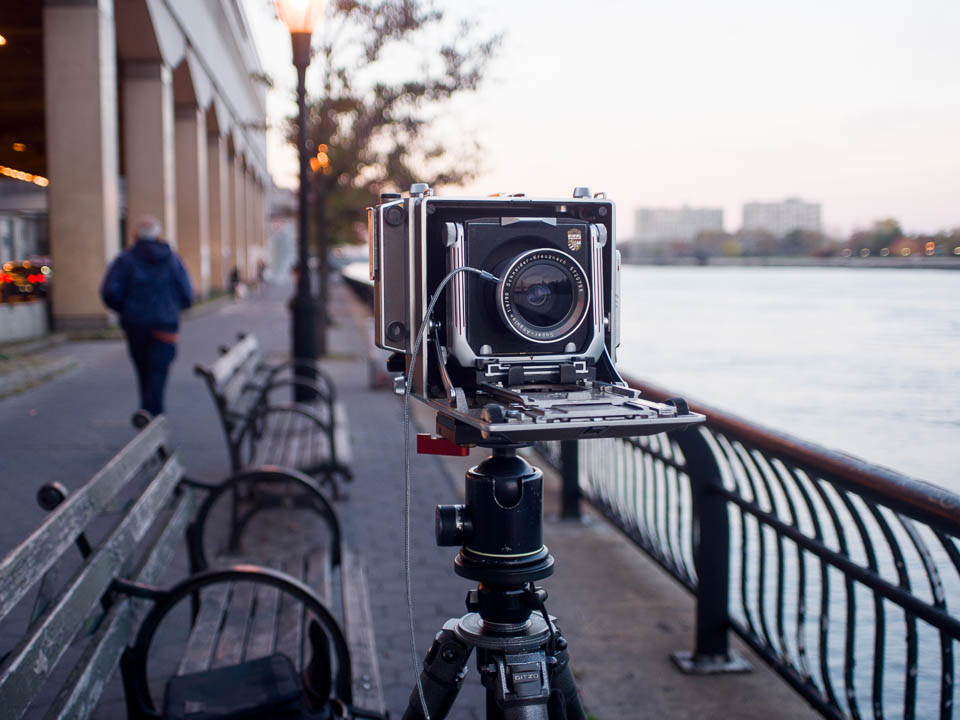
This is part 1 of a 2 part guide on how to calibrate a focusing cam for a lens on a Linhof Technika in order to get accurate rangefinder focusing. The images show a 4×5 Technika IV, but the method applies equally to other models including 6×9 and 5×7 cameras. Blank (uncalibrated) cams can be ordered from my Shapeways shop. Used cams found on ebay may also be used with certain limitations.
Part 1 of this guide is a check list to ensure that your camera functions optimally. Any inaccuracies in its general functioning can adversely affect the accuracy of the rangefinder, so let’s start with first things first. You should also ensure that your new cam is fitting well.
Part 2 describes the procedure for calibrating the cams to match your lens. Beware that this method is laborious, and will require a good deal of patience. If you work diligently it is possible to achieve a high degree of accuracy. Lets’ get started!
Some things to check before starting:
Is everything working correctly overall?
If you want your Technika evaluated by a professional, these are some Linhof specialists with solid reputations. Depending on your location:
- in the UK: Linhof Studio
- in New York: Nippon Photo Clinic
- in California: Laflex Camera
Having your camera functioning well is the essential starting point. If your camera has an existing lens and cam that is original, you will want to ensure that these are still accurate. If they are, your new and old lens and cam should be able to be used interchangeably.
If this camera is new to you or hasn’t been used in a while, it would by good to assess the general condition by following the advice from Laflex Camera. Following are a few more things to look out for. Of course you will want all perspective adjustments zeroed out at the front and back while doing these checks.
Is the ground glass in the same plane as the film?
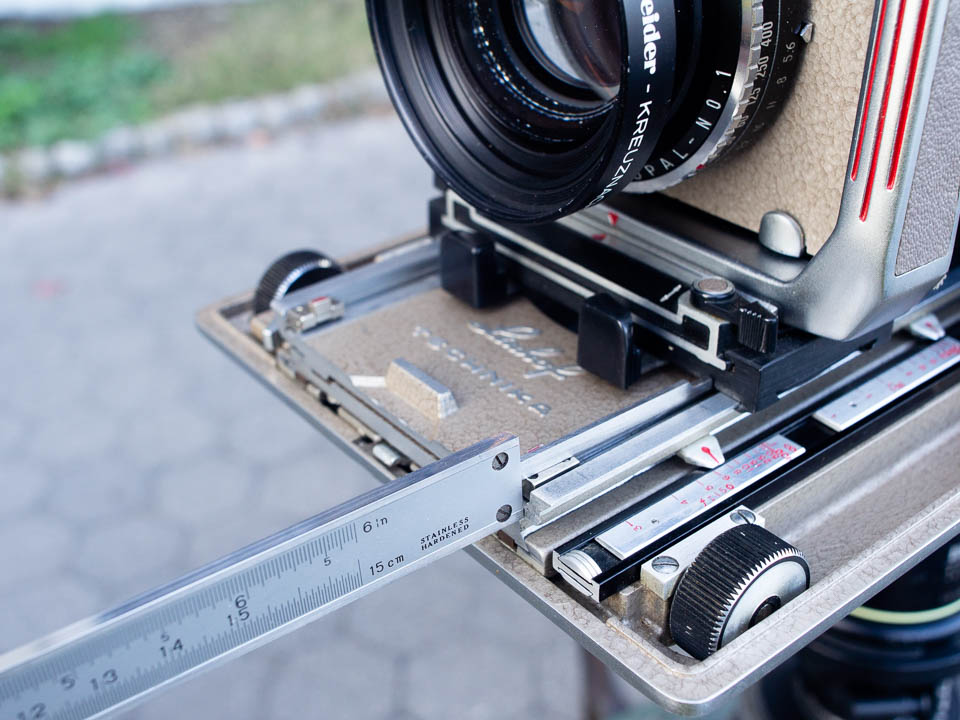
We assume this to be accurate, but Linhof have changed the design of the ground glass frame over the years, and things may not be original or not installed correctly. A crude check can be done with a caliper, comparing the distance from the front of the frame to the glass to the equivalent distance on a film holder with a sheet of film in it. Another way is to mount a known to be good Rollex roll film back, remove the film holder and lay a ground glass across the film guides. Compare the same focus points with this set up to the 4×5 ground glass and ensure they are identical. If photographs you have taken are out of focus while you focussed them carefully, that would suggest you may have a problem here.
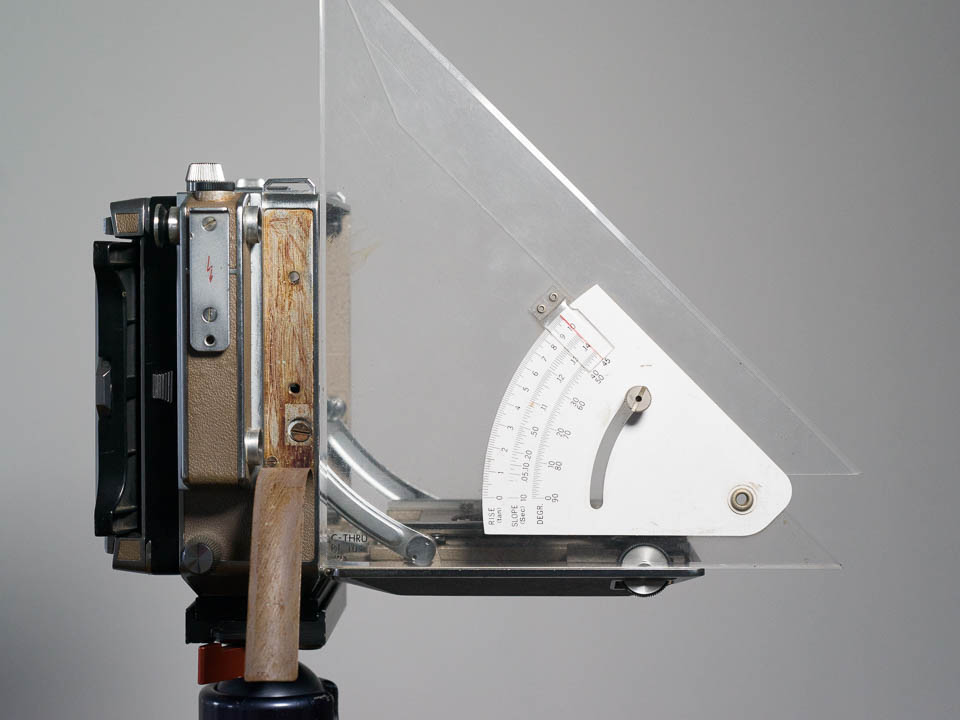
Does the front bed sit accurately at 90 degrees when open?
Hold a triangle to the body on the left and right side, and verify the angle of the bed. If the angle is not accurate, that will need to be corrected. The arms that hold the bed catches on two concentric studs inside the body. These studs can be rotated to adjust the resting angle of the bed. Lift part of the leather/leatherette hiding the set screws. Loosen the screws behind the concentric studs. Adjust the stud rotation until the bed is level. Catch and release the arms a few times to be sure they are engaging well. Match left and right carefully, and tighten the set screws.
A lens and cam that came with this body
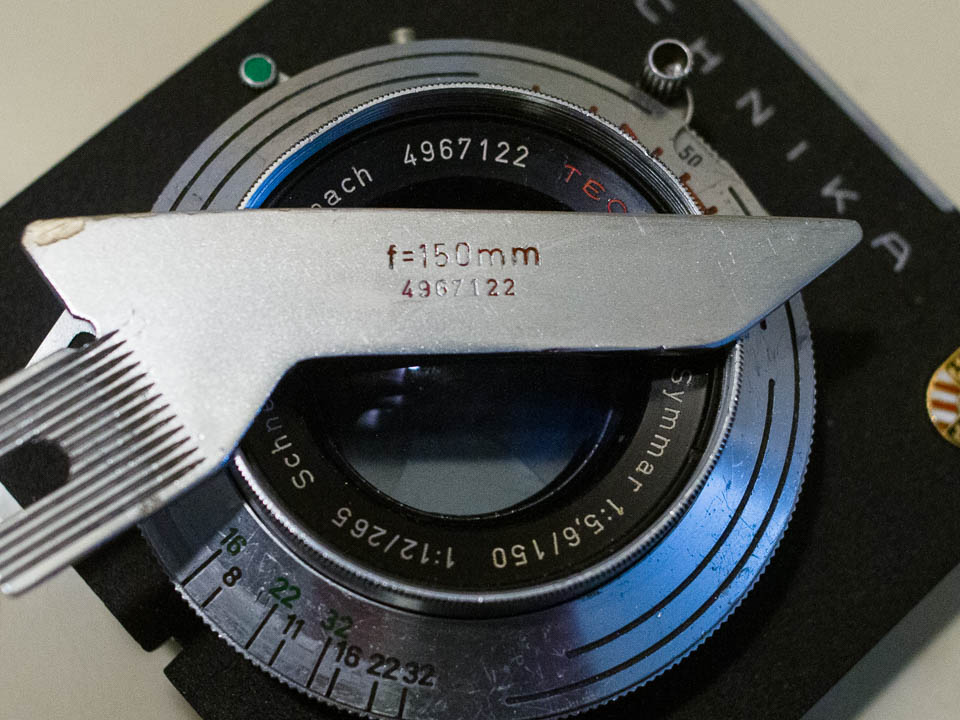
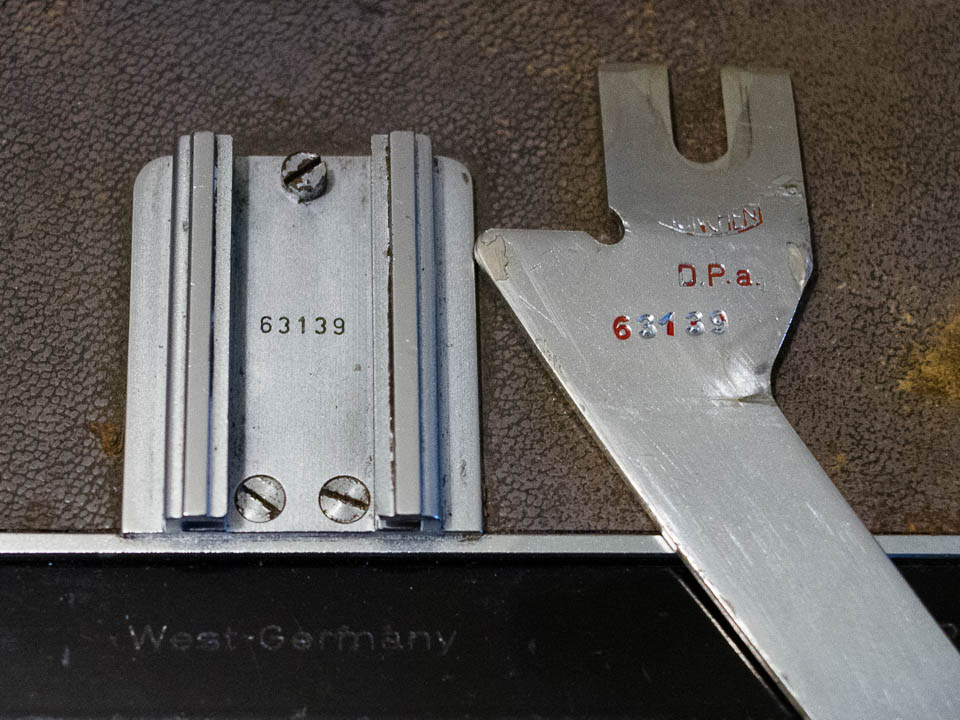
The first thing you want to determine is if this lens and cam belong together. Older Technika bodies will have both the serial number of the body and of the lens engraved on the cam. Newer bodies (I believe from the Master Technika on) are standardized, so they will only have the lens serial number on the cam. If they do match you will want to establish that the ground glass correctly shows infinity with the lens at its stops, and that the rangefinder indicates infinity correctly. Ensuring the original lens and cam are set up right will allow you to interchange them with your new lenses and cams in the field with confidence.
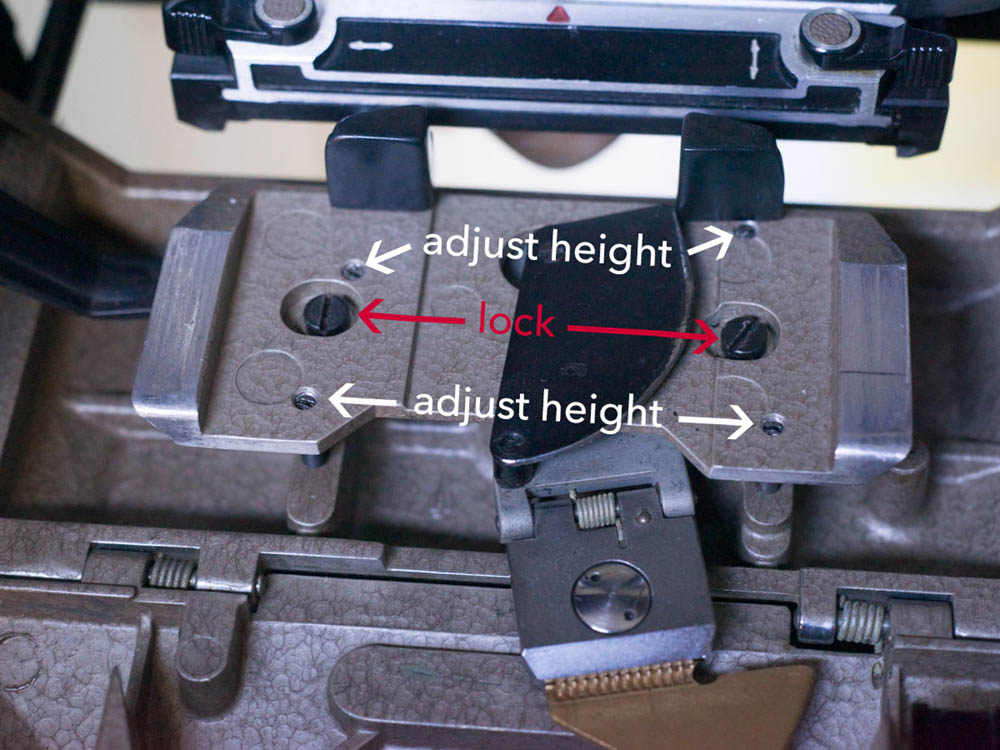
If the original cam that belongs to this body does not cause the rangefinder image to align at infinity, there could be multiple causes. In that case you will want to check the same things I am outlining below relating to fitting a new cam. If all else is ok you can consider adjusting the two screws hidden by the leather/leatherette at the bottom below the lower rangefinder window.
Is the lens on the right board?
Any lens needs to be on a good board. There are different types of original Linhof boards as well as lots of compatible boards by other brands (Toyo, Wista, Nikon and ‘nameless’), most of which are fine. Watch out for home made boards that may be missing the light trap. Typically the lens hole is not centered. The hole is positioned lower on the board to compensate for the elevated position of the board in the body. Some wide angle lenses were installed on recessed boards with the hole slightly higher if they are assumed to be used with a dropped bed. Number 3 size shutters tend to be centered on the light trap ring at the back of the board because they are so large.
Ensure that the lens sits flush. Sometimes there is a screw in the shutter for stopping rotation. If there is no hole for this screw to rest in, the lens will be tilted. Note if there are any shims. Use a lens spanner to loosen the lens ring, and tighten it with the lens in the right position if it was not.
Are the infinity stops both at correct position?
The default top bed profile position is used for lenses in the normal focal length range (120mm – 180mm). For longer lenses (210mm – 360mm) the top rail of the bed is slid forward, and with shorter focal lengths (75mm – 105mm) it is slid back until it clicks and locks in place. Mount the lens at its stop and check the focus on the ground glass in all corners and center. Use a suitably distant subject over 100m, especially with longer lenses. Check that stops are equal left to right. If they are not, one side of your images will be softer than the other.
Wide angle lenses are intended to be used with the bed dropped and the lens tilted back 15 degrees. This is to prevent the bed from appearing in the image in portrait orientation. If you don’t mind using the lens only in landscape orientation with the rangefinder, dropping the bed is not necessary. Which ever way you are intending to use it is how it should be set up and tested. Infinity stops or a cam set up for use with a dropped bed will not produce accurate focus when they are used with the level bed and vice versa.
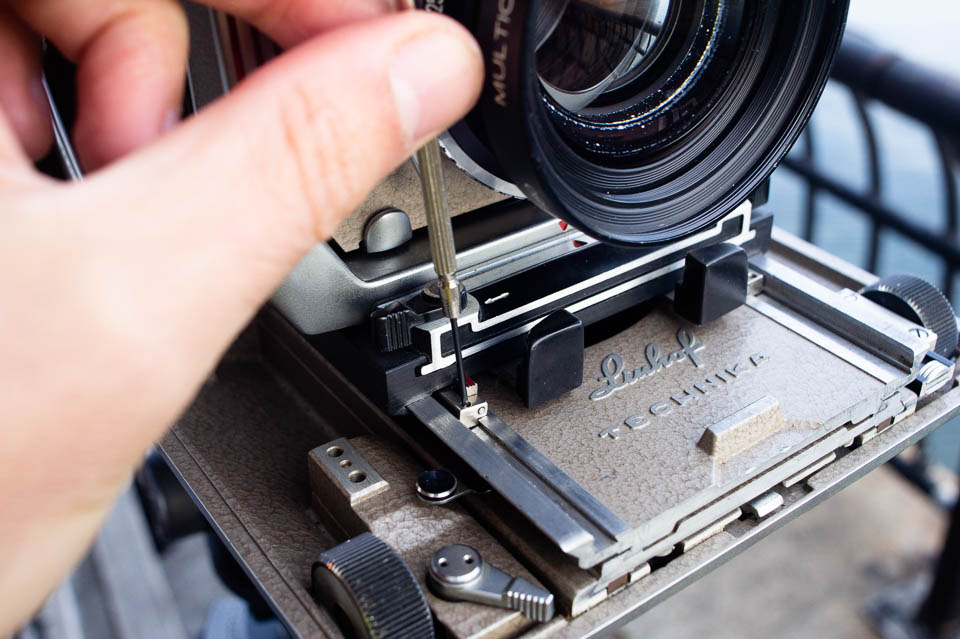
To set the stops in a new position, undo the set screw on top. With the focus rail locked fully back, reposition the lens standard until you are happy with the focus on the ground glass. Slide the stop up to the standard and tighten the little screw.
When you tighten the screw for the stop it makes an indentation in the rail. If the adjustment you are trying to make is very small, the point of the screw may pull into an old adjacent indentation and not where you want it to go. Provided that in the old position left and right are equal it may be better to leave the stops where they are. In that case you can add or remove shims between the shutter and the lens board to correct infinity focus.
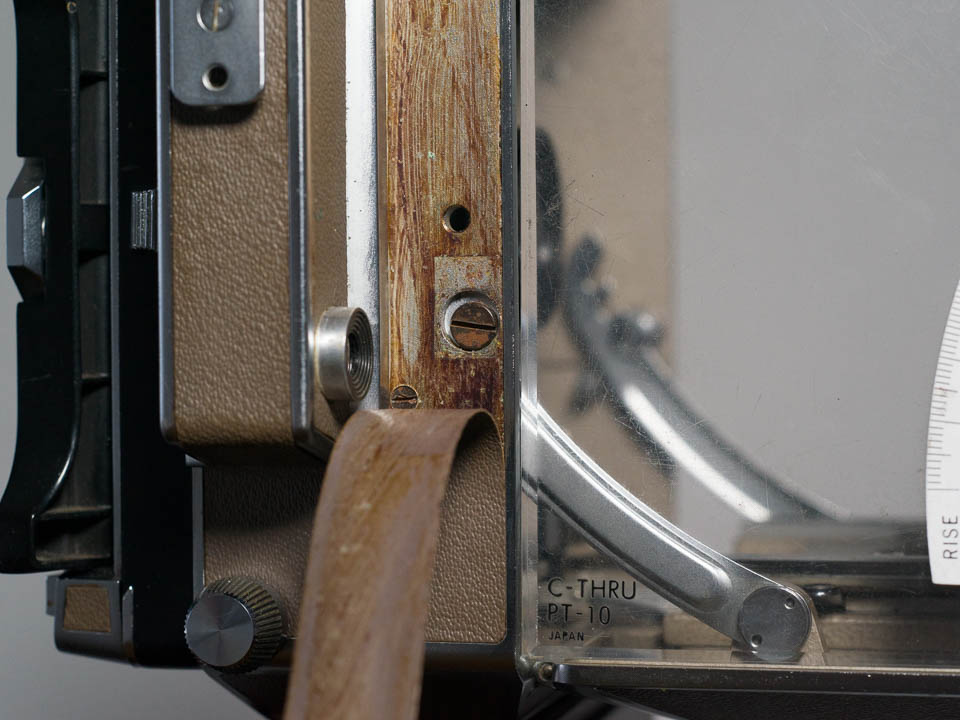
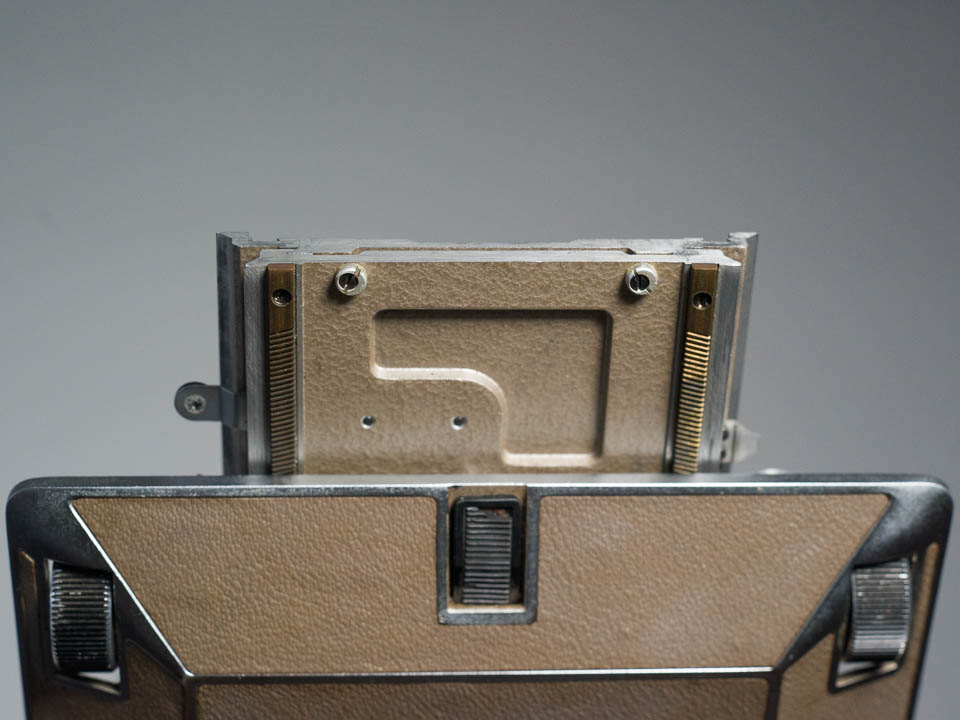
Should the body rail be adjusted?
Using the camera, you will frequently be moving the lens standard from the ‘resting’ rail in the body to the rail on the bed and back again. This body rail needs to be adjusted so that it is at the same height and aligned with the rail on the bed so the standard can be transferred smoothly. It is also important that it is not obstructing the swing of the cam. When the lens standard is placed in the body, it should engage the black blade on the cam arm and hold the cam foot at about 90 degrees. This is important so the cam does not get stuck or jammed when you are closing the camera.
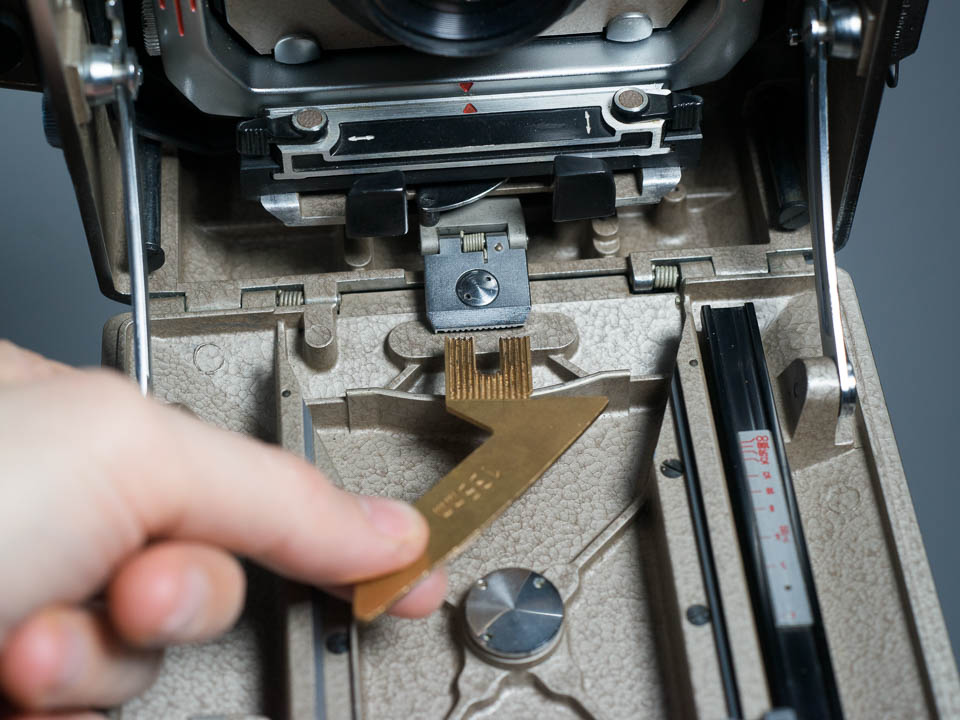
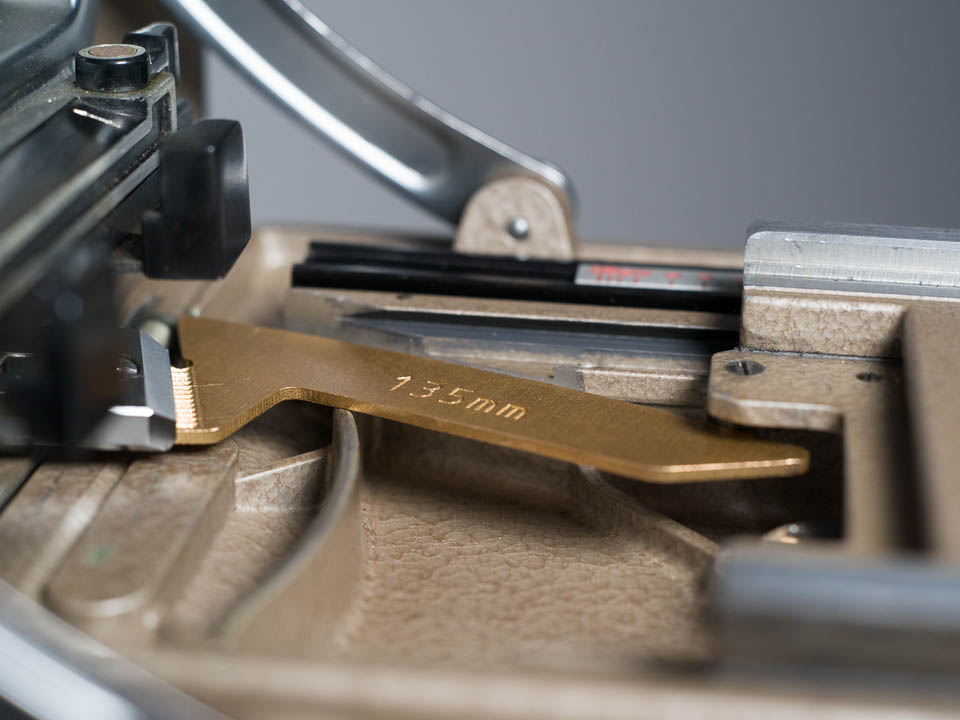
Does your new cam fit well?
With the lens mounted inside the body, slide the cam into the shoe. It should go in smoothly, but also fit tightly. See that it slides in completely to the end. Sometimes if the cam arm is not correctly centered the cam wheel can hook behind the cam when opening the body. If the cam fit is too loose it could pull the cam slightly out of the shoe.
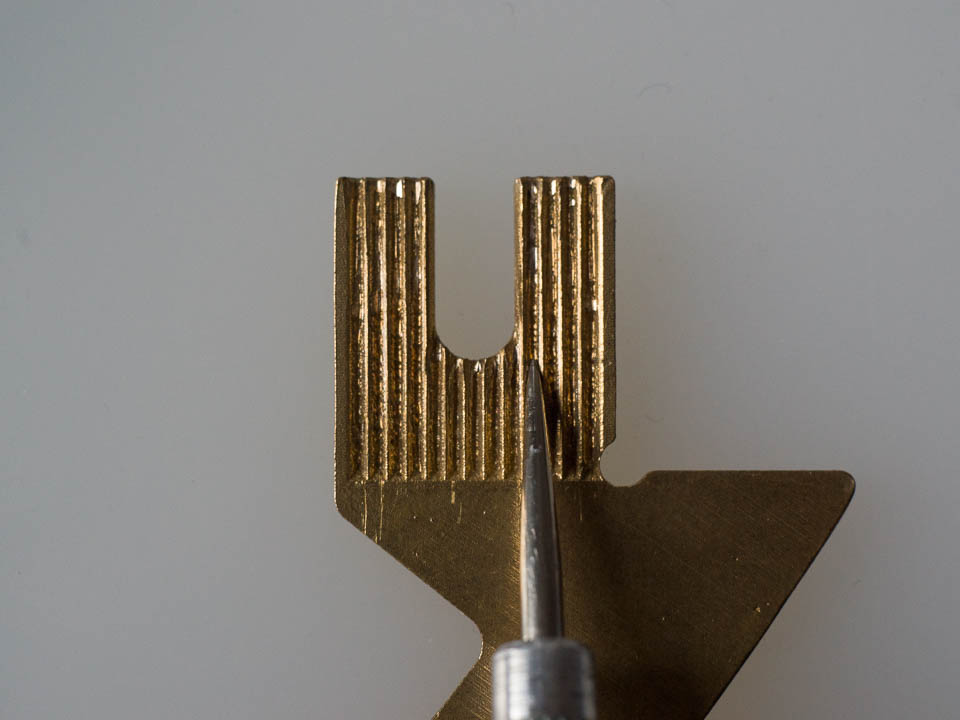
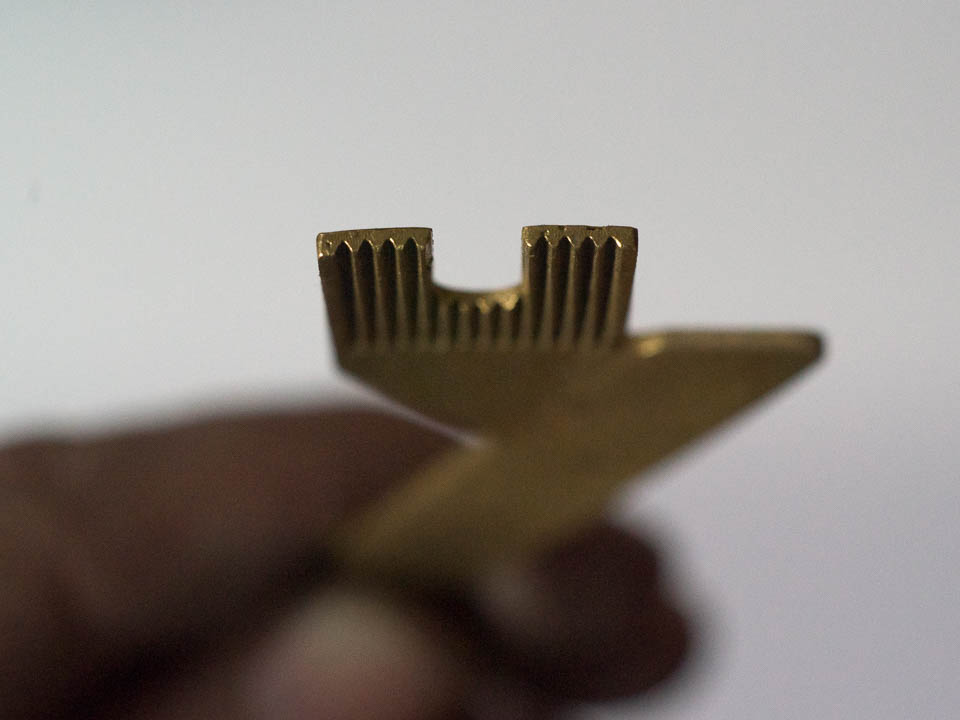
On cams from Shapeways look for any imperfections on the casting. Thankfully the quality has improved a lot lately. Use a blade, or file to remove imperfections that are preventing a perfect fit. Flatten any warping with a flat nose pliers wrapped in tape to avoid leaving scratch marks. If the cam is too loose, a light warp of the foot will tighten the fit.
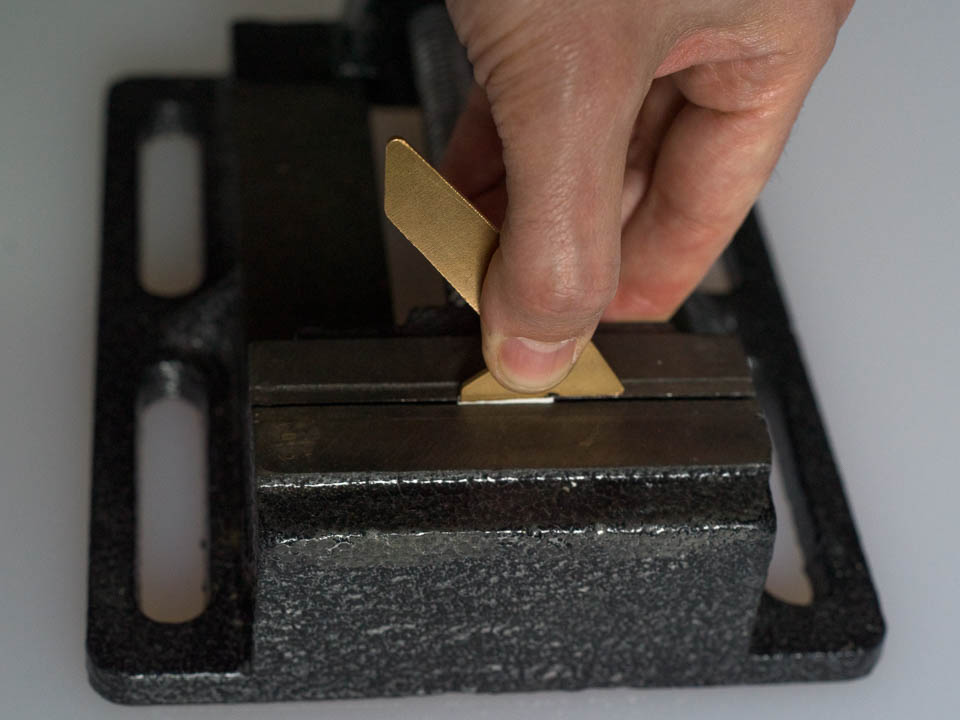
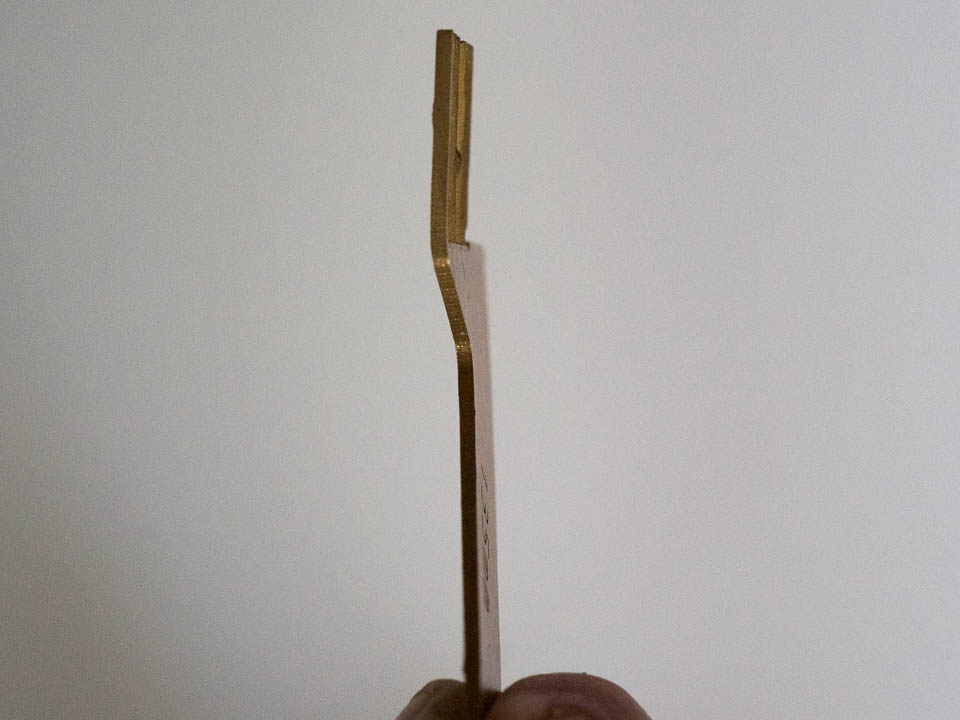
Bending the cam
With the cam mounted, slide the front standard forward on its body mount just enough so the cam disengages and can move freely. Roll the bed forward, and then ease it back and observe how the wheel below the bed engages the cam. Longer cams may sit at a downward angle causing the wheel to miss the tip of the cam and slide over the top. This jams things up, and if you force it you might warp the cam. The solution to this problem is to bend your cam slightly at the base. Many used cams will already have this bend. You will want to ensure that your cam is engaging comfortably. Too much bend will cause the cam to catch the bed instead of the wheel. You will want to repeatedly open and close the body, and extend and retract the bed to be sure that it is working consistently. If your wide angle lens is used with the dropped bed, you will also need to carefully observe that the wheel is catching the cam with the bed at its steep angle.

How does Rangefinder focusing on a Linhof Technika work?
Everything starts at infinity
When a lens is mounted on a Technika at its correct infinity stop on the rail, and the rail is rolled back as far as it goes, any objects at infinity should be perfectly in focus on the ground glass. Achieving focus on objects closer to us requires moving the lens away from the camera body. In the Technika camera this movement is translated via a number of mechanical linkages to the mirror system of the rangefinder. Because the correct position of the bed for any given focus point varies from lens to lens a unique cam is used to ensure accurate calibration for every lens. The diagram below shows the translation of the movement from the bed to the rangefinder. Take note of the direction of movement for each part from infinity to close focus. You may want to refer back to this to resolve any confusion later on. In your own camera observe these movements so you become familiar with the operation.
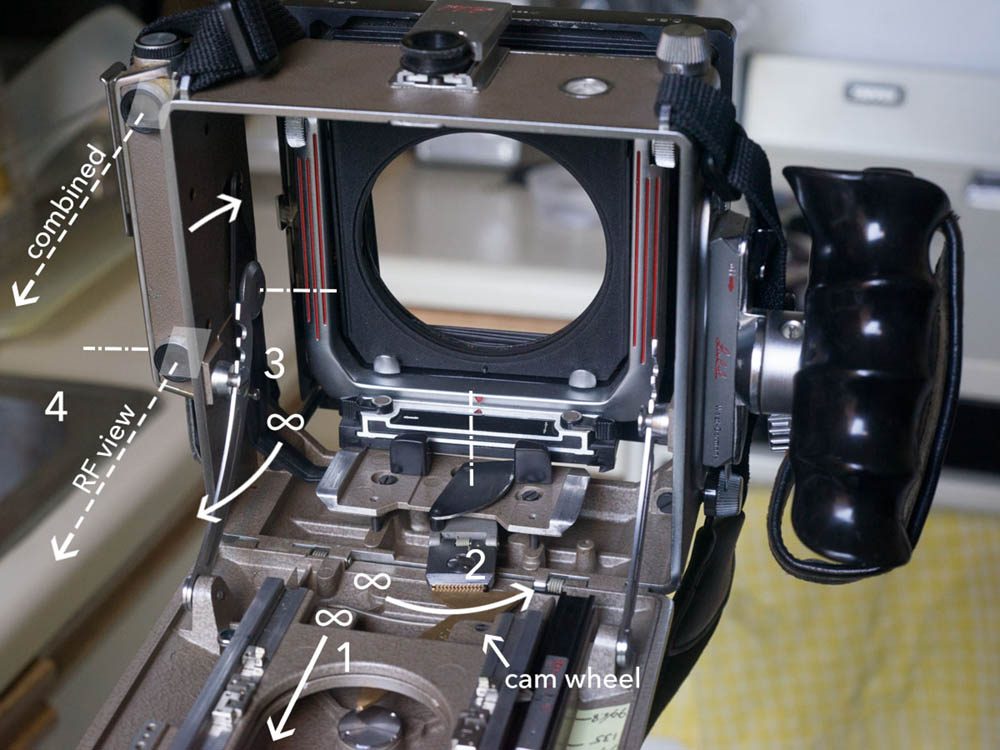
Dual focusing systems
It is important to appreciate that there are two systems working in parallel. There is the sliding bed with the infinity stops, the lens standard and the ground glass; and there is the rangefinder system with its cam, linkages and optical mirrors. These two systems meet where the wheel below the focusing bed touches the cam. The starting point for the calibration of these systems is the infinity position. Since these systems work in parallel any problem may be affecting only one or the other, or both. With the bed rolled back it is assumed that objects at infinity are rendered sharp on the film. It is also assumed that with a cam installed the rangefinders’ two images are aligned on a distant object.
The bed stops
There is one adjustment which affects both these systems, which are the small concentric rings which can be seen below the front of the rail when extended. These determine where the bed stops when rolled back. Leave these alone unless you have a strong suspicion that they have a problem, if for instance they have been tampered with in the past.
If infinity focus is off on the ground glass, the problem could be at the ground glass, at the infinity stops, or at the lens or lens board. Each of these will need to be checked.
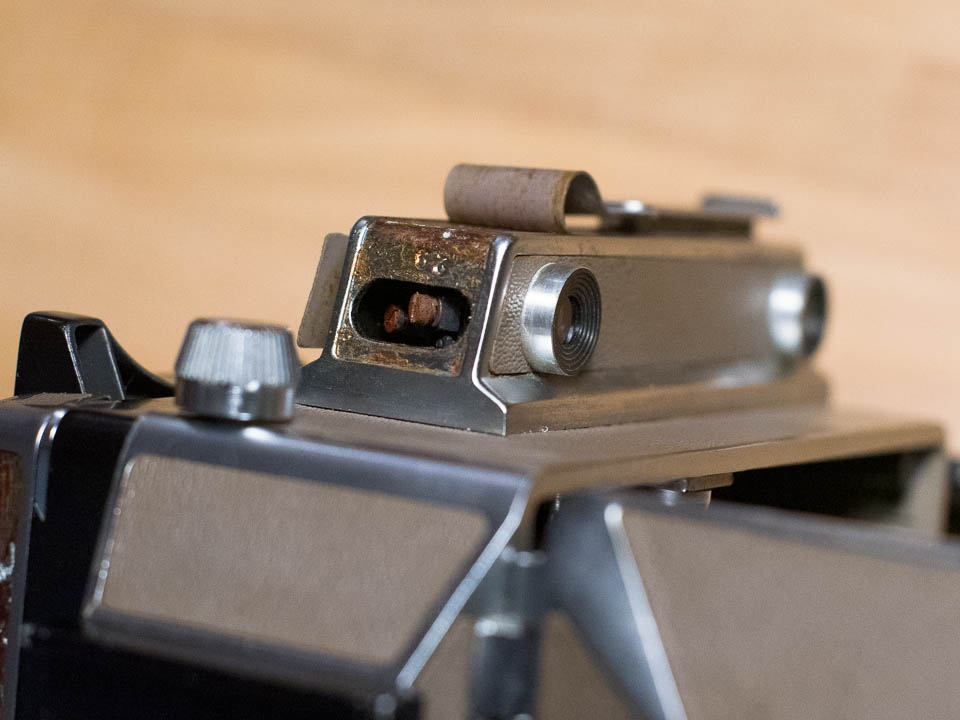
The rangefinder adjustment
If the rangefinder is not aligning, it could be a problem with the cam itself, it could be with how the cam fits, or it could be an issue with the rangefinder mechanism and mirrors. There are adjustment screws for the vertical and horizontal alignment of the rangefinder which can be accessed by removing the leather/leatherette on the rangefinder. Leave these alone unless you are certain that the problem is there.
Is that all?
If you are confident that everything on the camera is as good as it can be you are ready to calibrate your lens cam. I would always recommend using the camera on a tripod with film to get fully acquainted and to notice anything that you overlooked before. Part 2 of this tutorial describes the procedure for calibrating the cams for your lens.